


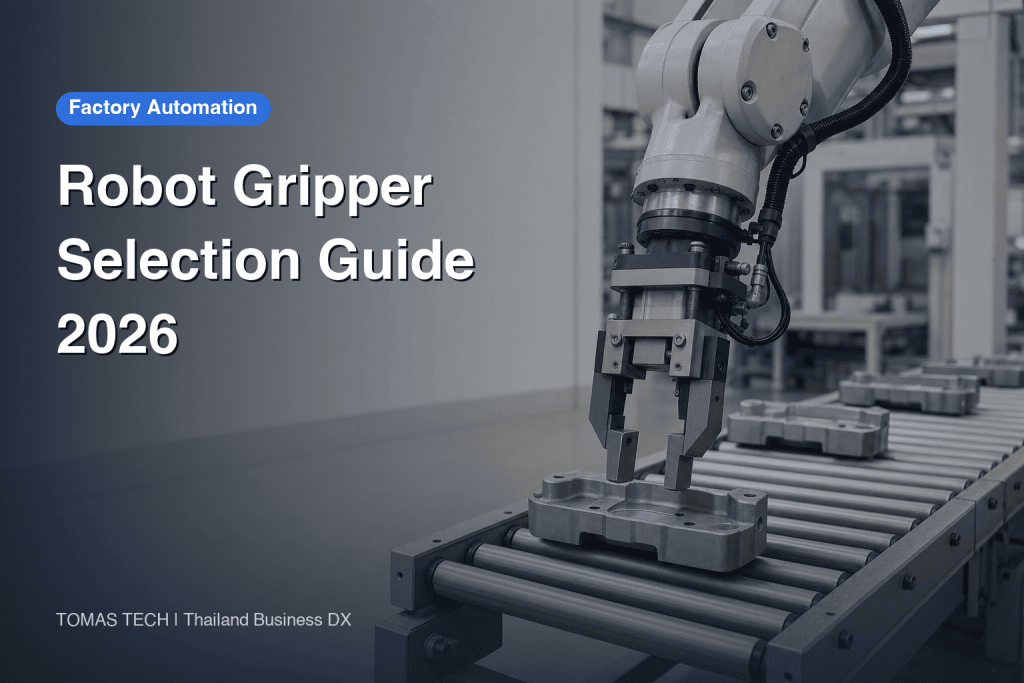
Robot Hand and Gripper Selection 2026 – 3 Types and Gripping Force Calculation
Most robot projects begin with a conversation about the arm – which model, which payload class, what it costs. Yet when a cell goes live and the customer calls to say “it isn’t running the way we expected,” the root cause is usually not the arm at all. It is the part bolted to the end of it. Robot hand and gripper selection is not a detail you settle after the robot model is fixed; it is an independent design problem that largely decides whether the project succeeds. If the robot cannot grip the part, it can do nothing. If it grips the part the wrong way, it damages it. And if you misjudge the force required, the part drops in transit. This article works through the differences between gripper types, how to calculate gripping force, how to budget payload, and how to handle high-mix changeover – all from the perspective of production engineers and maintenance managers running factories in Thailand.
Why the Hand, Not the Robot, Decides the Outcome
The robot arm itself is a heavily standardized product by now. Compare two six-axis arms in the same payload class and the same reach class from different makers, and the range of motions they can achieve is not very different. Repeatability, for typical material handling and assembly work, sits well below the threshold where it becomes a problem. In other words, once the requirement specification is fixed, the arm behaves almost like a catalog part.
The hand does not work that way. The hand is the only component that touches the workpiece directly, and it therefore absorbs everything about that workpiece – its shape, its material, its surface condition, its weight, its part-to-part variation, and the cycle time the process demands. No two factories present the same set of conditions, so the hand always contains an element of bespoke design. Part of it can be chosen from a catalog and part of it has to be built around your specific workpiece. That mix is the decisive difference from the arm.
This asymmetry shows up in both the quotation and the schedule. The price of the robot arm is essentially fixed at the enquiry stage, but the cost of the hand is not fixed until the workpiece conditions are settled. Our article on the real cost of palletizing robot projects makes the same point: the hand and the infeed side are the two variables that move the total figure the most. With an identical arm, whether you are handling sacks, cartons, or mixed pallets changes both the system price and the commissioning period.
The hand is also the component whose problems arrive late. A poor arm selection is visible during the early study phase. An underdesigned hand shows up only after volume production starts, as an increase in micro-stoppages, as scratches on the workpiece, as cycle times that never quite reach target. Fixing it at that point rarely stops at remaking the jaws or switching the vacuum cup. It spreads to the fixtures, to the orientation control on the infeed side, and sometimes to the payload rating of the arm itself. That is exactly why the hand should not be left until the end. It should be the first item you take up, because working on the hand is what forces the workpiece conditions to be nailed down.
What an End Effector Is – Sorting Out the Terminology
Before you start, it helps to align the vocabulary, because three terms that point at roughly the same thing are used interchangeably in this field, and unaligned terminology makes internal discussion go in circles.
An end effector is the broadest term. It refers to any device mounted at the end of a robot arm that performs the actual work. That includes not only devices that grip, but also welding torches, paint guns, screwdriving spindles, sealant dispensing nozzles, and inspection sensors. In English-language markets the term end-of-arm tooling, abbreviated EOAT, is also widely used, and market research reports generally use that wording.
A gripper is the subset of end effectors whose function is to grip and hold the workpiece. Whether it pinches or whether it sucks, if it holds the part it is a gripper. Robot hand is the term most often heard on the shop floor in Japanese-affiliated plants, and for practical purposes it can be treated as a synonym for gripper. Some contexts reserve “hand” for multi-finger devices analogous to a human hand, but in Japanese manufacturing practice even a simple two-jaw chuck gets called a hand.
To put it in order: end effector is the widest term, gripper is a subset of it, and robot hand is everyday shop-floor shorthand for a gripper. What this article deals with is the gripper – the end effector whose job is to hold. When you write a specification, pick one term and fix it across the whole document. If “hand” and “end effector” appear in the same drawing set, it becomes ambiguous how much of the assembly beyond the mounting flange is included, and the scope of the quotation drifts as a result.
One more point worth knowing: the mounting face between arm and hand is standardized. ISO 9409-1 defines the mechanical interface of the robot, meaning the flange dimensions and bolt pattern, and a hand built to that standard can be mechanically mounted on arms from different manufacturers. Mechanical fit and signal and power availability are two separate questions, however. More on that below.
Types of Robot Hands – Mechanical, Vacuum, and Soft Adaptive
Grippers divide broadly into three types according to the physical principle they use to hold the part. Once you have these three in mind, you can usually narrow the candidates to two the moment you look at the workpiece.
| Type | How it holds | Suited workpieces | Watch out for |
|---|---|---|---|
| Mechanical (parallel jaw, etc.) | Pinches mechanically with jaws | Parts with irregular geometry, assembly workpieces | Jaw geometry must be designed per workpiece |
| Vacuum | Draws a flat, smooth surface with negative pressure | Cartons, glass sheets, electronic trays | Fails if no usable suction surface exists |
| Soft adaptive | Flexible material conforms to and wraps the part | Food products, fragile parts, irregular shapes | Low upper limit on holdable weight |

Mechanical grippers open and close jaws to pinch the workpiece. The parallel jaw type, where two jaws open and close on parallel axes, is by far the most common; there are also three-jaw types that center the part and angular types whose jaws swing through an arc. Their strength is in parts with irregular geometry and in assembly processes that require precise positioning. Because both the gripping position and the gripping force can be controlled, the orientation of the part after gripping is stable.
Vacuum grippers pull a flat, smooth surface against a cup using negative pressure. The vacuum source is either a compressed-air-driven ejector fed from the plant air line, or an electric pump carried on the hand itself. They suit workpieces such as cartons, glass sheets, and electronic component trays, where the top face is flat and the exact gripping position does not need to be tightly controlled. Because no jaw design is needed, they also have the practical advantage of faster commissioning.
Soft adaptive grippers use a flexible material such as silicone that deforms along the contour of the workpiece and holds it by wrapping around it. They suit workpieces whose shape varies from piece to piece – food products, for example, or parts that break if you apply force. Their conformity to contour is the highest of the three, and they are the least likely to mark the part, but they lag the other two types in both holdable weight and stability of the held orientation.
When you are undecided, the standard move is to start from the parallel jaw. Its range of applicability is the widest of the three, which means you can keep the study moving forward even before the workpiece conditions are fully settled. The moment a clear reason emerges why a parallel jaw will not work, that reason tells you which way to branch. If the reason is “the top face is flat but there is no accessible side face to pinch,” you go to vacuum. If the reason is “part-to-part variation is large and the item is fragile,” you go to soft adaptive.
How to Choose a Gripper – Narrowing Down from the Workpiece
Staring at a list of gripper types does not move the selection forward. In practice you work from the workpiece side and eliminate conditions in order. Ask the following questions in this sequence and, in most projects, the field narrows to two candidates or fewer.
First, does the workpiece have a flat, smooth surface? If yes, vacuum enters the field of candidates; if no, vacuum is ruled out as a matter of principle. Note that “yes” here has to include the condition that the same face is presented upward regardless of how the part arrives. If the infeed delivers parts in varying orientations, the existence of a flat face is not enough to make vacuum work.
Second, how much part-to-part variation is there? If dimensional variation is large, or the part is soft and does not hold its shape, fixed-geometry mechanical jaws cannot accommodate the whole range. Soft adaptive grippers, or servo-driven mechanical hands whose opening stroke can be controlled, become the candidates.
Third, how much accuracy is required after the part is gripped? If the robot only has to move it, holding it is enough. But if the process continues with inserting the part into a bore, or driving a screw while holding it, a mechanical gripper – which fixes the orientation the instant it closes – has the advantage. With a vacuum gripper the position at which the cup lands becomes the orientation, so the accuracy of the infeed becomes the accuracy of the operation.
Fourth, can the surface tolerate contamination or marking? A finished surface where a cup ring would be unacceptable, or a part with oil on it where suction will not stabilize, each gives you a reason to branch to a different type.
Fifth, what does cycle time demand? A hand with a long jaw opening stroke adds that opening and closing time directly to the cycle. Vacuum adds the time to draw down onto the part and the time to blow off the vacuum for release. Catalog open/close times are usually no-load values, so ask for a measurement taken with your actual workpiece in the jaws.
By the time you have answered these five questions, the gripper type is essentially decided. From here on, the work is designing the force.
Practical Gripping Force Calculation – The Formula and Safety Factor Guidance
Once the type is settled, the next thing to decide is the gripping force required. Decide this by feel and you end up in one of two places: an oversized hand that pushes you over the payload limit, or an undersized hand that drops the part in transit. Gripping force can be calculated.
F = (m × (g + a) × SF) / (μ × n)
The symbols mean the following. F is the required gripping force, m is the mass of the workpiece, g is gravitational acceleration, a is the maximum acceleration the workpiece experiences while the robot is holding it, SF is the safety factor, μ is the coefficient of friction between the jaws and the workpiece, and n is the number of contact points.
What the formula tells you is which factors drive the required force up and which drive it down. Three factors drive it up: mass, acceleration, and safety factor. Two drive it down: the coefficient of friction and the number of contact points. The design freedom sits mostly in the latter two. Adding urethane or a knurled surface to the jaw face to increase friction, or adding contact points to distribute the load, are both ways of enlarging the denominator of this formula.
The safety factor guidance depends on the direction of transfer. A factor of 2 is the common guideline for purely horizontal transfer, and 4 where the motion includes a vertical lift. Where acceleration and deceleration are high, or where there is any possibility of collision with surrounding equipment, you raise the figure above that guideline. A factor of 4 for vertical work may look generous, but in a vertical lift the full weight of the workpiece acts in the slip direction, so keeping a thick margin is the rational choice.
The parameter that needs the most care is μ. It varies with the jaw and workpiece materials, the surface roughness, and whether oil or cutting fluid is present, and using a catalog value directly will let you down on the real machine. The classic accident is calculating an oily metal part with a coefficient valid for a dry surface, and dropping it. The rule is to take samples of the actual workpiece in its actual surface condition and measure. Where that is not yet possible, calculate conservatively – that is, with a smaller μ than you think you have.
A Worked Example – The Same Part Can Need Three Times the Force
The formula alone does not convey much, so let us put numbers into it. The common conditions here are a workpiece of 5 kg mass, gripped with a coefficient of friction of 0.2 at 2 contact points. The value of 0.2 is an assumption used to show the calculation procedure; on a real machine, replace it with a measured value.
| Condition | Safety factor SF | Max acceleration a | Required gripping force F |
|---|---|---|---|
| Horizontal transfer, negligible acceleration | 2 | 0 m/s² | approx. 245 N |
| Horizontal transfer, max acceleration 5 m/s² | 2 | 5 m/s² | approx. 370 N |
| Vertical lift, max acceleration 5 m/s² | 4 | 5 m/s² | approx. 740 N |
The same 5 kg workpiece, gripped by the same jaws, needs anywhere from 245 N to 740 N – a spread of roughly three times. Nothing about the workpiece changed. Only the motion conditions changed. What this table shows is that “a hand that grips a 5 kg workpiece” does not function as a specification. A hand specification is determined not by the weight of the workpiece but by the combination of that weight and the motion conditions.
Follow the breakdown. Simply moving from a horizontal condition where acceleration is negligible to one that allows for a maximum acceleration of 5 m/s² raises the required force from 245 N to 370 N, about 1.5 times, because 5 m/s² is added on top of a g of 9.81 m/s². Change it again to a vertical lift and raise the safety factor from 2 to 4, and it doubles from there to 740 N. A requirement to “run it faster” comes straight back at you, through this formula, as a hand specification.
The denominator side is worth checking too. Under the same vertical lift conditions, increasing the contact points from 2 to 3 brings the required force down from about 740 N to about 494 N. If jaw design can improve the coefficient of friction from 0.2 to 0.4, it halves again. In other words, the answer to “we do not have enough gripping force” is not only “buy a stronger hand.” In many cases, reworking the jaw surface treatment and the contact point layout is the better answer on both weight and cost.
The Payload Budget Trap – The Hand’s Own Weight Eats the Rating
After gripping force, the next trap is how you read the payload rating. This is where mistakes cluster most heavily in the early phase of a study.
The rated payload of a robot includes the weight of the hand itself. Everything mounted beyond the wrist flange counts against the payload; you do not get to count only the workpiece.

Look at it concretely. Suppose you mount a hand weighing 2 kg on a robot rated at 10 kg.
| Item | Weight |
|---|---|
| Robot rated payload | 10.0 kg |
| Hand’s own weight | 2.0 kg |
| Remaining capacity for the workpiece | 8.0 kg |
The capacity available for the workpiece is 8 kg, not 10 kg. Choose the robot model without accounting for that 2 kg difference and a plan to handle a 7 kg workpiece starts life with a margin of just 1 kg – dangerously thin.
And the hand is not the only thing beyond the flange. In a configuration with a tool changer, the weight of both the robot-side plate and the tool-side plate is added. In a vacuum configuration with several cups, the frame and the vacuum generator add weight. If you mount a camera or a proximity sensor on the hand, that counts, and strictly speaking so do the cables and air tubing routed along the arm.
Then there are center of gravity and inertia. Two hands can both weigh 2 kg and load the wrist axes completely differently if one has its center of gravity right at the flange face and the other has it 300 mm out. Most robots specify allowable moment and allowable inertia separately from payload, and it is entirely possible to be inside the weight limit yet fail on moment. Whenever you design long jaws, or a hand that grips the part far from the flange, check the manufacturer’s allowable value tables without exception. On top of that, a robot run close to its payload limit has to reduce acceleration and deceleration, which stretches cycle time. Recall that what created the difference between 245 N and 370 N was acceleration – which makes it clear that weight margin is also cycle time margin.
As a practical rule of thumb, add the hand’s own weight to the workpiece weight and choose a model that still leaves roughly a 20 percent margin against the rating. It is far from unusual for weight to grow later, when new workpieces are added or the jaws are remade.
Selecting Vacuum Cups – The Surface Question Comes First
If you go with vacuum, cup selection brings its own set of issues that need a different way of thinking from the gripping force formula.
The first thing to confirm is whether a suction surface can be obtained reliably. Even where the top face is flat, negative pressure escapes if the carton surface has raised printing, or if the item is film-wrapped and the film wrinkles. Vacuum works through a surface, so with a workpiece where surface quality cannot be guaranteed, a bigger cup does not solve the problem. This judgment belongs at the gripper type selection stage, not later.
Next, decide how the negative pressure is generated. An ejector fed from the plant air line has low initial cost and simple maintenance, but consumes air continuously. An electric pump carried on the hand removes the need to route air lines and limits power consumption to the moments when suction is active, at the cost of added hand weight. Since that feeds directly into the payload budget from the previous section, decide this at the same time as the robot model, not afterwards.
Cup count and layout follow from the weight distribution of the workpiece. With items like cartons, where the contents can shift to one side, load concentrates on the cups nearest the displaced center of gravity. Simply spacing the cups evenly means the heavy side peels away first. Confirm the center of gravity of the load format that will actually run, lay out the cups accordingly, and where possible build a configuration in which the vacuum circuits can be controlled in separate groups per workpiece type. That pays off in mixed-load operation.
Finally, do not forget to design for consumables. Cups are rubber parts. They wear and they harden. Replacement frequency and ease of replacement have a direct effect on availability. A design that requires the whole hand to come off in order to change one cup will generate complaints once the line is running.
High-Mix Changeover and Tool Changers – Cost and Payback
If a single hand could handle every part number, life would be simple. In reality, workpieces that differ completely in shape and material run down the same line. At that point you have three options: build one universal hand that handles everything, prepare dedicated hands per workpiece and swap them manually, or change them automatically with a tool changer.

A tool changer consists of a matched pair of plates, one on the robot side and one on the tool side, allowing the robot to attach and detach hands by itself. Because electrical signals and air are connected at the same time as the mechanical coupling, the cell can run immediately after a change.
As a cost guide, one system – that is, the combination of the robot-side plate and the tool-side plate – runs roughly 9,000 to 20,000 US dollars. Taken in isolation, that is not cheap. What changes the judgment is switching the point of comparison from “the cost of adding another hand” to “the cost of adding another robot.”
| Comparison | Cost guide |
|---|---|
| Tool changer, one system (robot side + tool side) | 9,000-20,000 US dollars |
| Additional robot arm (one unit) | 30,000 to over 100,000 US dollars |
You hear the argument on the shop floor often enough: if each part number needs its own dedicated hand and the line stops at every changeover, we may as well stand up a separate robot for each part number. But the total cost of a tool changer, even taking the upper bound of 20,000 US dollars, stays below the 30,000 US dollar lower bound for an additional arm. On a line with frequent high-mix changeover, reusing one arm via a tool changer can be the economically rational choice instead of adding arms.
Three manufacturers come up as the main candidates.
| Manufacturer | Positioning |
|---|---|
| ATI Industrial Automation | QC-11 and CC6 series widely adopted worldwide |
| Schunk | Strong European OEM lineage, frequently specified on ABB and KUKA |
| OnRobot | Oriented to collaborative robots; supports Universal Robots, FANUC CRX, and others |
Before you select, check compatibility with your existing equipment first. In plants running European-built arms, matching the peripheral equipment to European suppliers can be an advantage in parts availability and technical support. If you are running collaborative robots, or considering them, the safe route is to choose a manufacturer that explicitly lists support for them. For the wider picture on collaborative robots, see our article on the cost and rollout approach for collaborative robots.
If you do go with a tool changer, the payback calculation looks like this. The number of changeovers multiplied by the downtime per changeover is the production time you lose per year. Convert that time into money, then subtract the cost of the changer and the cycle time penalty from the added weight. The rough dividing line is this: if changeover happens a few times a month, manual swapping is cheaper; if it happens several times a day, a changer earns its keep.
Hand Selection Patterns by Process – Palletizing, Picking, Assembly
“Gripping” is one word, but the center of gravity of the selection shifts completely with the process. Here are three representative cases.
In palletizing, the workpieces are cartons or sacks, and their shape usually makes the top face easy to access, so vacuum is the first candidate. What matters here is not only the weight of a single item but how many items you grip at once. Grip two at a time and the cycle time approaches half, but the required payload doubles. The payload budget and hand weight issue described above comes straight back at you as a decision about the number of robots and the arm model. Stacking pattern, carton quality, and whether mixed loads are involved are all selection criteria as well. The overall cost structure is covered in our article on the cost of palletizing robot projects.
In vision-guided picking, the premise is that the position and orientation of the workpiece change every cycle. Hand selection here is done from the standpoint of how much of the error in the vision-derived position data the hand can absorb. What tolerates positioning error well is a soft adaptive gripper with a broad contact area that still grips when slightly off, or a mechanical gripper with generous opening stroke. Vacuum, by contrast, has to descend accurately onto the intended surface, which raises the accuracy demand on the vision side. The seeing side and the gripping side cannot be decided independently. We set out this relationship in our article on robot vision deployment, where the work is broken into four parts – seeing, teaching, gripping, and connecting. This article goes deep on the gripping part.
In assembly and screwdriving, the requirement changes character. Here the objective is not gripping so much as moving the gripped part accurately to a target position. A mechanical gripper, which fixes the orientation of the part uniquely at the moment it closes, is the baseline, and the jaws are designed to seat against the locating faces of the part. In a process such as screwdriving, where the device on the flange is a working tool rather than a gripping tool, you are no longer selecting a gripper at all but a dedicated end effector. If the same cell runs a part-handling step followed by a screwdriving step, that is where a tool changer earns its place. For details, see our article on assembly automation robots.
Line up the three processes and a common structure appears. What determines the hand specification is less the workpiece itself than the processes on either side of it. How consistently does the infeed present orientation, and how much accuracy is demanded after gripping? Settle those two and the required hand performance narrows down considerably.
Hand Selection for Factories in Thailand and ASEAN – Sourcing and Site Conditions
Seen from the position of someone running a factory in Thailand, hand selection carries an additional layer of local considerations.
First, the sourcing environment itself is changing. Thailand ranks 14th in the world for installed robot count and second within ASEAN behind Singapore, with more than 3,300 robots already in operation. In the Southeast Asian industrial and service robot market, Thailand held the largest share in the region at 24 percent as of 2024. That scale means the conditions are now in place for suppliers – including suppliers of peripheral equipment – to establish themselves locally.
Market trends in end-of-arm tooling point in the same direction. Against the background of global electronics and automotive OEMs siting new facilities in ASEAN as part of supply chain diversification, Vietnam and Thailand are described as emerging as newly important regions for the EOAT market. For components that a few years ago would have been imported from Japan or Europe by default, it is now reasonable to assume that local stock and local support are increasingly available options.
This change bears directly on selection practice. For vacuum cups, which are replaced frequently, and for jaws, which carry a risk of damage, whether the part can be obtained locally determines availability. A hand that is excellent on paper but built from parts that have to be air-freighted will stop the line for days at a time whenever something fails. At the quotation comparison stage, always confirm local stock of consumables, the technical support structure of the distributor, and the response time in an emergency.
Site conditions matter too. Factories in Thailand run in high humidity, and in some seasons condensation forms. Moisture carried into the air line destabilizes vacuum generators and solenoid valves, and becomes a cause of lost suction. Air dryer and filter specifications are items to review at the same time as you decide the gripper type. In dusty processes, you need ingress protection for the sliding parts of the jaws and a specified protection rating. In metalworking areas where cutting oil is thrown around, redo the gripping force calculation on the assumption that the coefficient of friction differs from the dry condition.
Pre-Order Checklist – Items to Settle Before You Request Quotations
Here is everything above, organized as items to settle before ordering. With these in hand, quotations from several suppliers stop being a list of prices and become a comparison of conditions.
- A list of workpieces to be handled, with dimensions, mass, material, and surface condition for each
- The measured range of dimensional variation and the degree of part-to-part difference
- Whether the workpiece has a flat, smooth suction surface, and whether that face is always presented in the same orientation
- The positioning accuracy required after gripping, and the downstream process requirement that justifies it
- The maximum acceleration during motion, and whether a vertical lift is included
- The measured coefficient of friction, or the conservative assumed value to be used where measurement is not possible
- The weight and center of gravity position of the candidate hands, and the remaining capacity against the robot rating
- Changeover frequency between part numbers, and the allowable downtime per changeover
- Whether a tool changer is assumed, and if so the additional weight it brings
- Consumable replacement frequency and the local procurement route
- Actual site conditions for humidity, dust, oil, and air quality
- The likelihood that new workpieces will be added after commissioning, and their expected weight
Of these, the first seven are the inputs directly required for gripper type selection, gripping force calculation, and payload evaluation. Issue an enquiry with those fields still empty of numbers and each supplier will design a hand on a different set of assumptions, so no meaningful comparison is possible. Conversely, once those seven are fixed, the candidate types narrow, the required gripping force falls out of the formula, and adding the hand weight tells you the payload class of the arm.
Common Failure Patterns
Here are the failures that occur most often, organized by cause.
First, deciding the robot arm first. The classic rework case: budget pressure leads to ordering a 10 kg class arm up front, the hand is designed afterwards and comes in at 3 kg, and only 7 kg of capacity is left for the workpiece. The hand is not a component that gets decided after the arm. At minimum, an estimate of its weight should exist before the arm model is fixed.
Second, setting gripping force from the workpiece weight alone. What created the difference between 245 N and 740 N was not the workpiece but the motion conditions. A specification reading “hand for a 5 kg workpiece” does not stand up. A specification that omits acceleration and transfer direction has not stated the gripping force requirement at all.
Third, calculating with a catalog coefficient of friction. Real workpieces carry oil, cutting fluid, release agent, and dust. A gripping force calculated with a dry-condition coefficient will be inadequate on the floor. Skipping the sample measurement and then having to redo the jaw surface treatment after volume production has started is rework you want to avoid.
Fourth, selecting without thinking about the consumables supply. A hand chosen on performance whose vacuum cups are unobtainable locally, requiring an air freight wait at every replacement, will reliably reduce availability. The hand is the component in continuous contact with the workpiece, so it will always wear.
Fifth, proceeding with automation while leaving changeover manual. On a high-mix line, if hand swapping is the one step left to human hands, that step becomes the bottleneck for the whole line. Push the design forward without putting numbers to changeover frequency and downtime, and you will never assemble the evidence needed to decide whether a tool changer is justified.
Sixth, overlooking center of gravity and moment. Even inside the payload envelope, a hand with long jaws and a distant center of gravity will exceed the allowable wrist moment. A design validated on weight alone ends up having to reduce acceleration on the real machine, and the cycle time originally promised is never achieved.
Summary – The Hand Is Not Decided Last
To restate the argument. Robot hand and gripper selection is not a subordinate detail attached to choosing an arm model. It is the work of fixing the workpiece conditions, and it belongs at the very start of the study.
There are three broad gripper types. Mechanical suits parts with irregular geometry and assembly work; vacuum suits cartons and trays where a flat surface is available; soft adaptive suits irregular, fragile items. When undecided, the standard move is to start from the parallel jaw.
The required gripping force is given by F = (m × (g + a) × SF) / (μ × n), with safety factor guidance of 2 for horizontal transfer and 4 for vertical lifts. For one and the same 5 kg workpiece, the required gripping force moves by roughly a factor of three depending on motion conditions. Because the payload rating includes the hand’s own weight, fitting a 2 kg hand to a 10 kg rated robot leaves 8 kg for the workpiece. On lines with frequent high-mix changeover, a tool changer at 9,000 to 20,000 US dollars becomes a candidate for replacing an additional arm costing 30,000 to over 100,000 US dollars.
And for deployments in Thailand, weigh sourcing and environmental conditions as heavily as performance. Can the parts be obtained locally? Will the equipment survive the humidity and the dust? Neither question is answered anywhere in a catalog, yet these are the factors that determine availability.
If You Are Stuck on Robot Hand Selection
Unsure which gripper type should be your baseline for your own workpieces? Or perhaps you do not yet have the weight variation and friction conditions of your parts as actual numbers. We welcome enquiries at that stage too. TOMAS TECH is based in Bangkok and works with Japanese-affiliated manufacturers across Thailand and ASEAN on everything from production management systems to factory automation. We can start by walking through your current process and workpieces and helping you sort out which numbers need to be pinned down first. Please get in touch through our contact form.
Frequently Asked Questions
Are a robot hand and a gripper the same thing?
For practical purposes they can be treated as synonyms. A gripper is a device whose function is to grip and hold a workpiece, and robot hand is the everyday shop-floor term for the same thing. Some contexts reserve “hand” for multi-finger structures resembling a human hand, but in Japanese manufacturing practice even a simple chuck is called a hand. Fixing one term across your specifications makes it less likely that the scope of a quotation drifts.
What is an end effector?
It is the broadest term for any device mounted at the end of a robot arm that performs the actual work. It covers not only grippers but also welding torches, paint guns, screwdriving spindles, and inspection sensors. In English-language markets it is also called end-of-arm tooling, abbreviated EOAT. So end effector is the widest term, and gripper is a subset of it.
Can a robot rated at 10 kg handle a 10 kg part?
No. The rated payload includes the weight of the hand itself. Fit a 2 kg hand to a 10 kg rated robot and the capacity available for the workpiece is 8 kg. In a configuration using a tool changer, the two plates add to that; in a vacuum configuration with several cups, the frame and vacuum generator add to it as well. On top of that, even inside the weight limit, a distant center of gravity can put you over the allowable wrist moment, so check the manufacturer’s allowable value tables at the same time.
How do you calculate gripping force?
Use F = (m × (g + a) × SF) / (μ × n), where m is the workpiece mass, g is gravitational acceleration, a is the maximum acceleration, SF is the safety factor, μ is the coefficient of friction, and n is the number of contact points. Safety factor guidance is 2 for horizontal transfer and 4 for vertical lifts, raised further where acceleration and deceleration are high or collision is possible. Because the coefficient of friction varies greatly with surface condition, measure it on your actual workpiece as a matter of principle.
When should a tool changer be introduced?
When part number changeover is frequent and the line stops each time to swap hands. The total cost of one system is roughly 9,000 to 20,000 US dollars, but the judgment changes when the comparison is against one additional robot arm at 30,000 to over 100,000 US dollars. Even the 20,000 US dollar upper bound stays below the lower bound for an additional arm, so on a high-mix changeover line the economics work out. If changeover happens only a few times a month, manual swapping is cheaper.
References
- Differences between the three gripper types (mechanical, vacuum, soft adaptive), the workpieces each suits, and the convention of starting from the parallel jaw – standardbots.com
- The gripping force formula and the meaning of each parameter – en.iprworldwide.com
- Approach to end effector selection, safety factor guidance, and the ISO 9409-1 flange mounting standard – roboticsengineeringlab.com
- Confirmation that rated payload includes the hand’s own weight, and its relationship to gripping force – blog.robotiq.com
- Tool changer cost bands, comparison against an additional arm, and positioning of the main manufacturers – grabarobot.com
- Thailand’s world ranking for installed robot count, its position within ASEAN, and its share of the Southeast Asian market – asianroboticsreview.com
- Trends in the end-of-arm tooling market and the positioning of the ASEAN region – persistencemarketresearch.com